How to login
To connect to ASC you need:
- username
- password
- phone number for receiving OTP (One Time Password)
Info
The OTP is valid for 12 hours. You still need to enter your password each time for every new ASC session.
Login methods:
VPN
Since November 2013, access to ASC has been restricted to IP addresses associated with participating partner universities of the ASC project. Users wishing to connect from outside these IP ranges must first log in to a machine or service within their university network. A common method for connecting is using a Virtual Private Network (VPN). Here are specific instructions from some of our partner universities.
- University of Vienna: English | German
- TU Vienna: English | German
- University of Innsbruck: German
- University of Graz: German
- TU Graz: Web Single Sign-On
Warning
You need to be in a partner university's network to access ASC, you can either be physically on campus or connected through the university's VPN.
Wireguard
Info
In case your university or organisation does not provide access to ASC via their VPN you can also get direct access by using our "Wireguard" service.
Note: If you already have access through your university/organisation you do NOT need wireguard.
Note
This can replace the VPN connection described above. However, the tunnel only connects you to the ASC network, so other services provided by the Universities which need VPN will not be available.
- Send a request to our support ticket system stating that you want to use our Wireguard service and why. After reviewing your request we will then assign you the rights to setup your wireguard configuration and access our network.
-
Download and install wireguard for your platform from the official wireguard website
-
Once you have installed wireguard and got the access rights, head to auth.asc.ac.at and sign in using your ASC Account (see Signup in case you don't have an account yet)
- After the login you will see your dashboard which should look as follows:
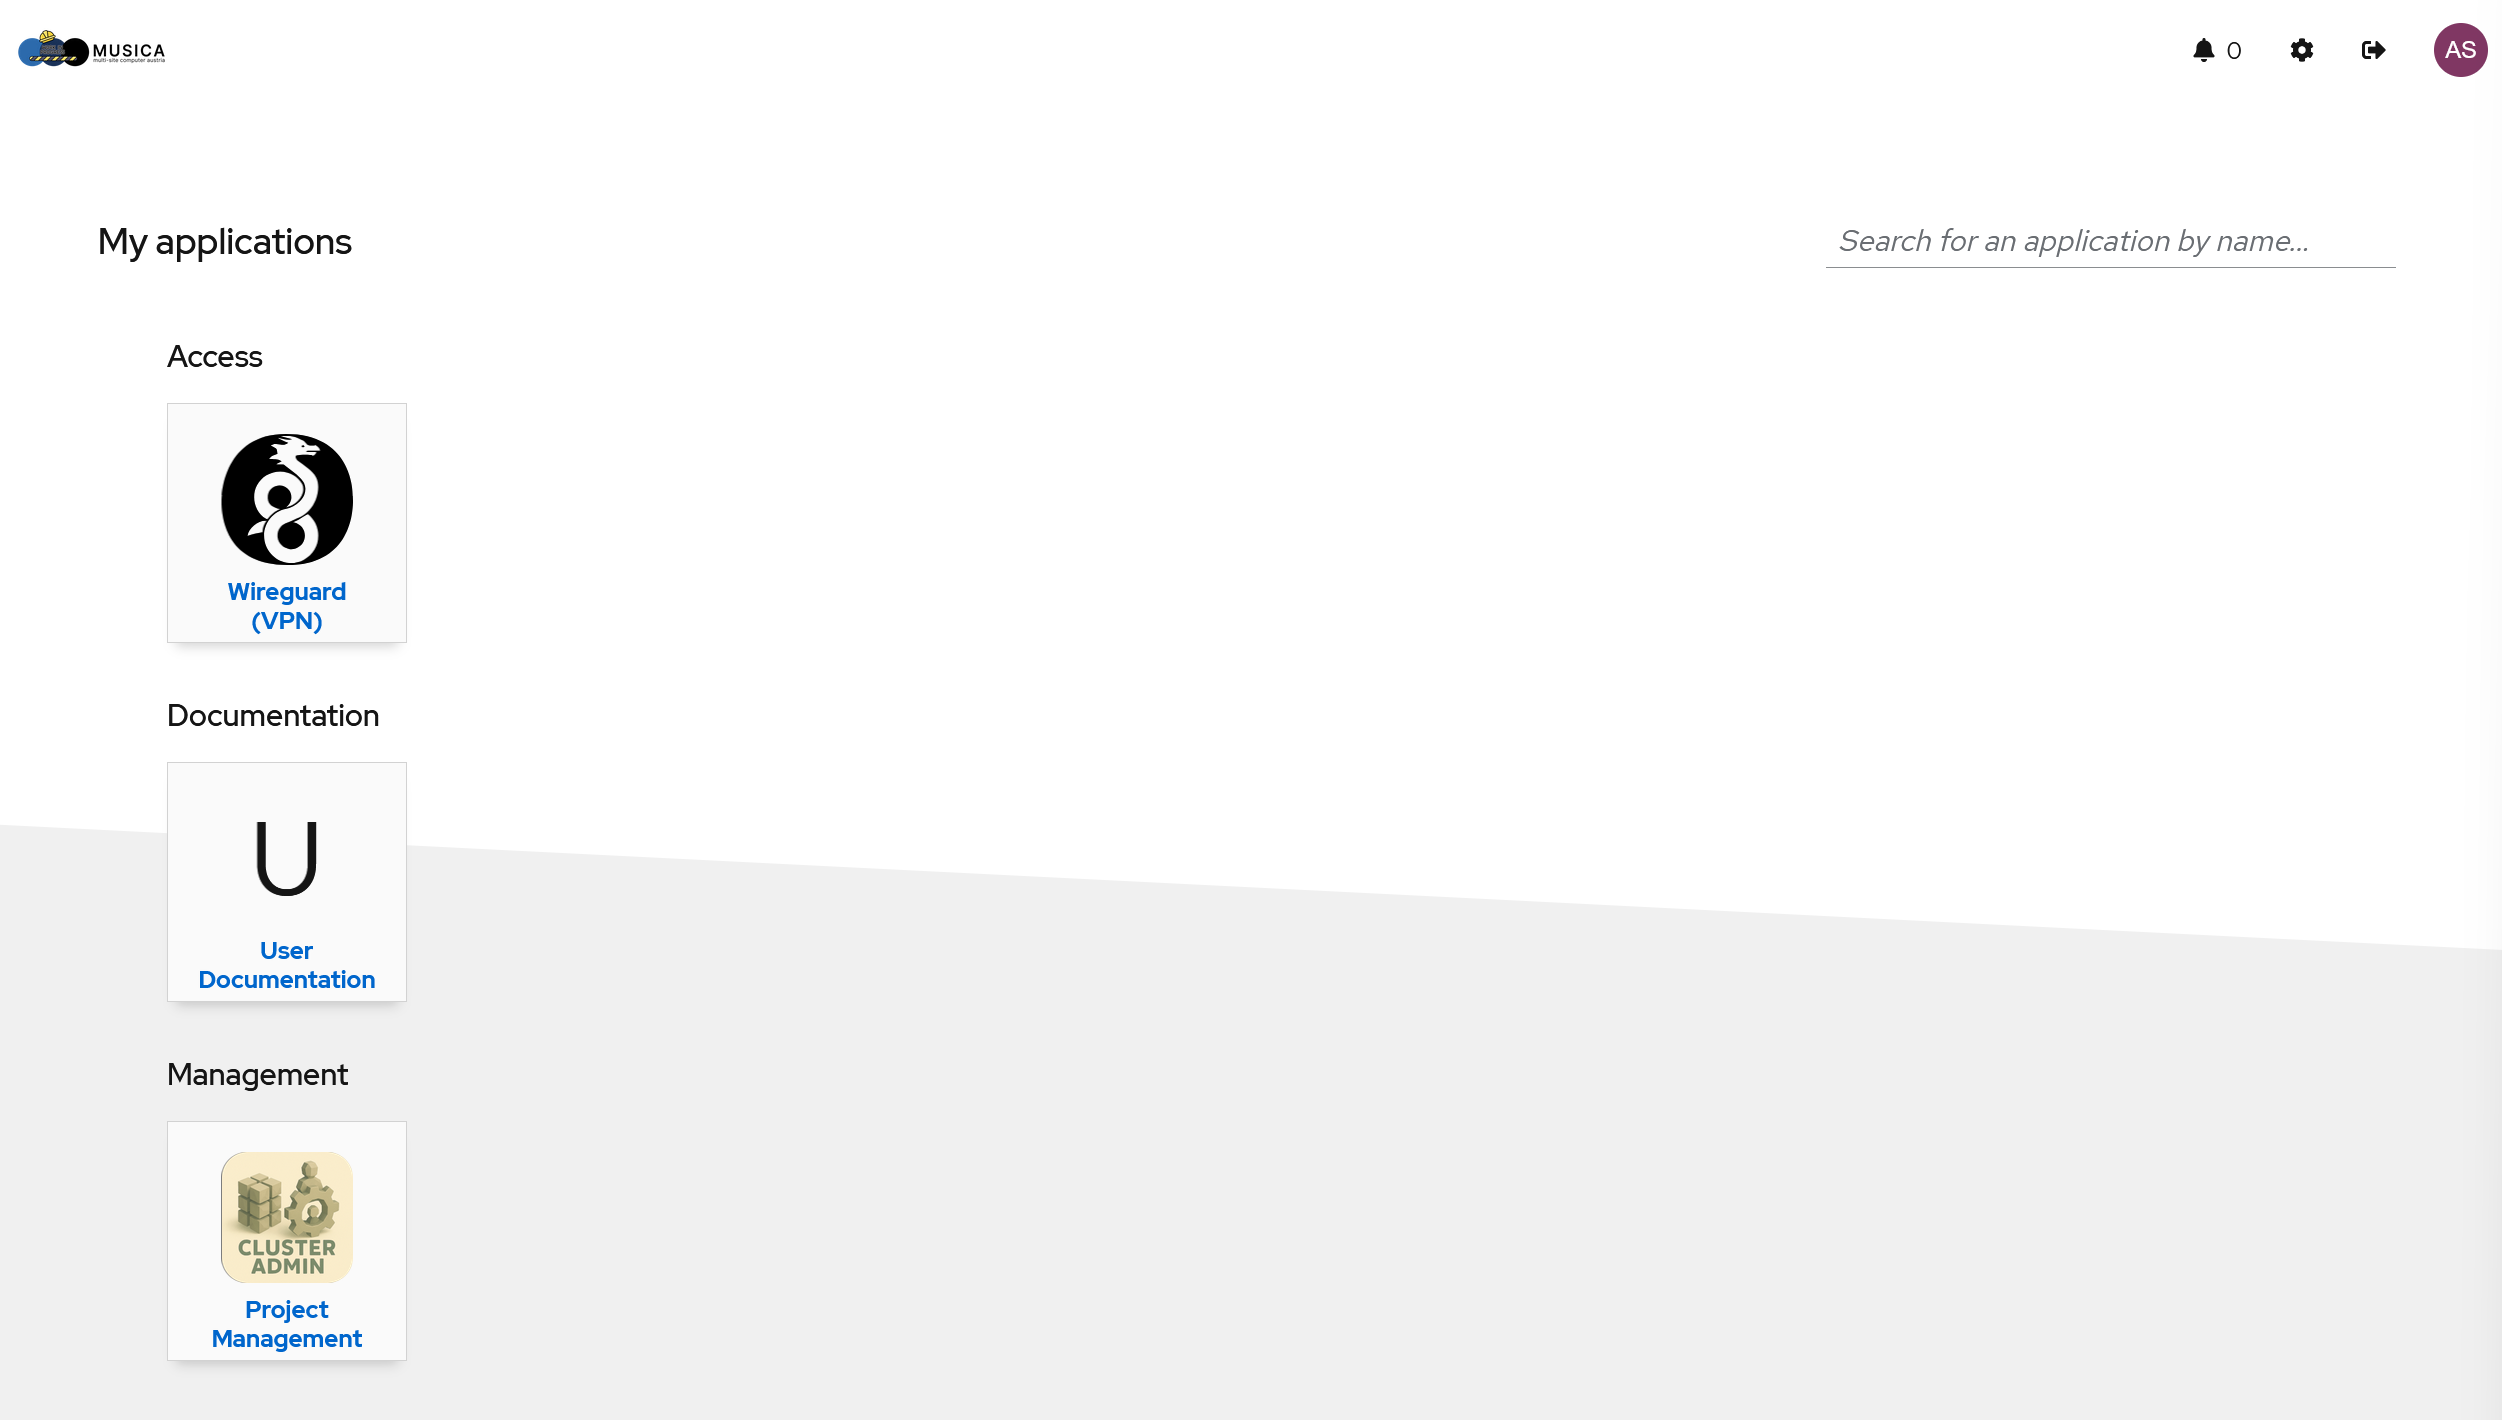
- Click on the "Wireguard (VPN)" button. This will open a new browser tab to our Wireguard Self-Service page wg-pub.asc.ac.at.
- Once installed, follow steps 1 and 2 indicated in the image below
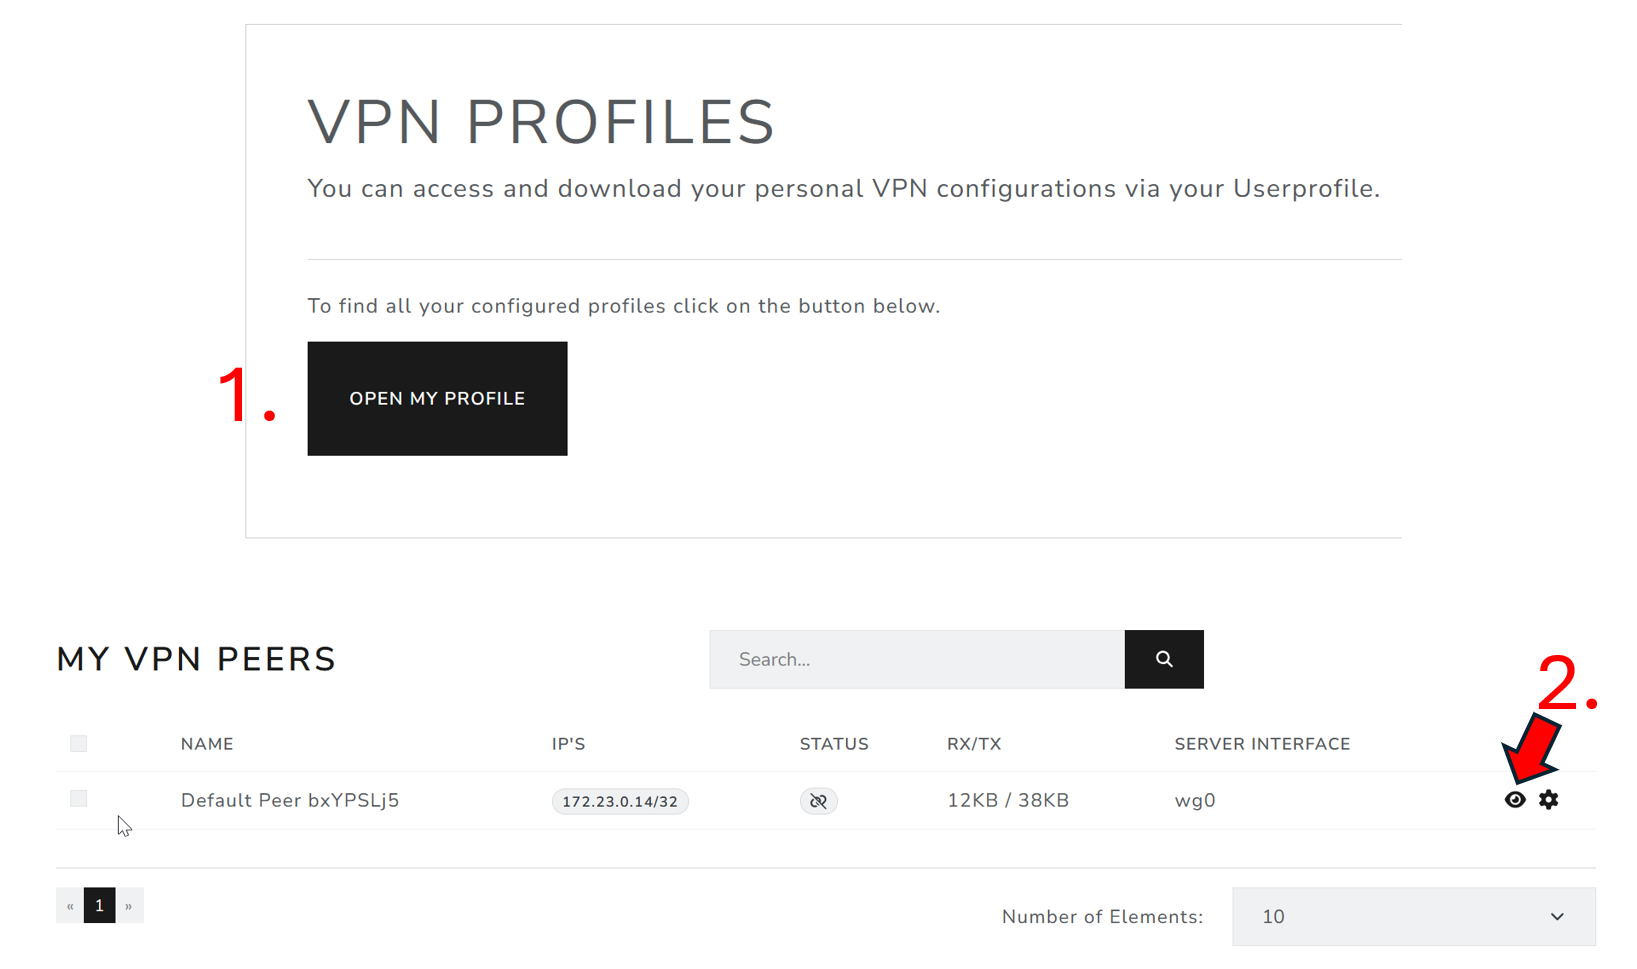
This will open a page, where you will need to download the configuration file from steps 3 and 4 indicated in the image below.
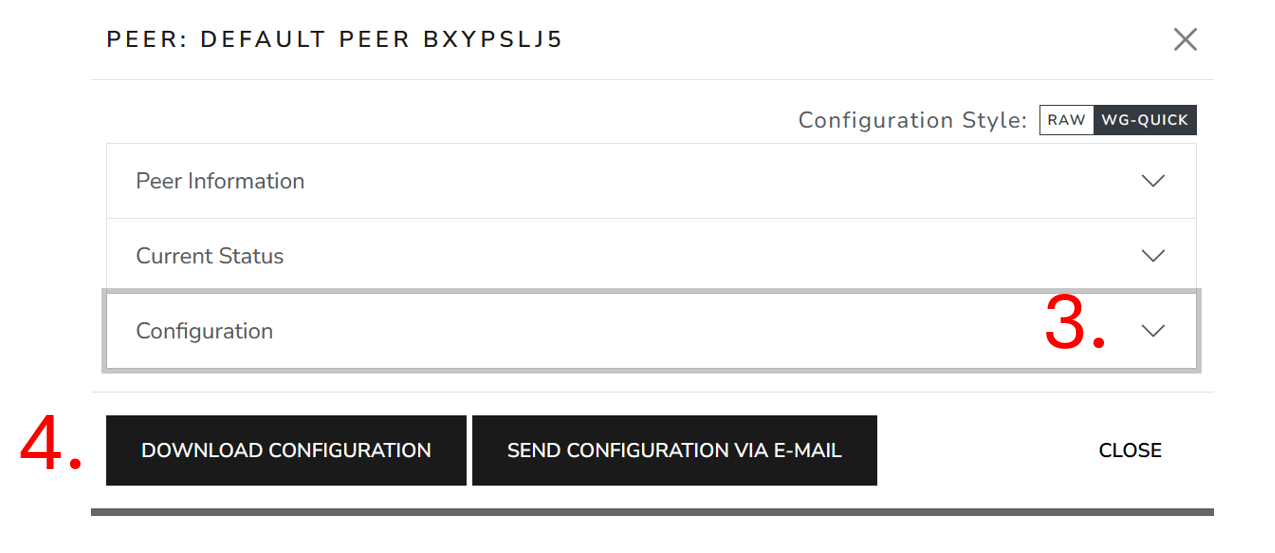
- Save the configuration file in a folder with a name of your choice (keep the
.confending).
For Windows/MacOS users
- Once the above steps are done, open the Wireguard GUI
- In case the GUI does not show immediately, right click the wireguard icon and select "Manage Tunnels"
- Click "+" / "Add Tunnel" -> "Import Tunnel(s) from file ...", select the downloaded tunnel configuration and click "Import"
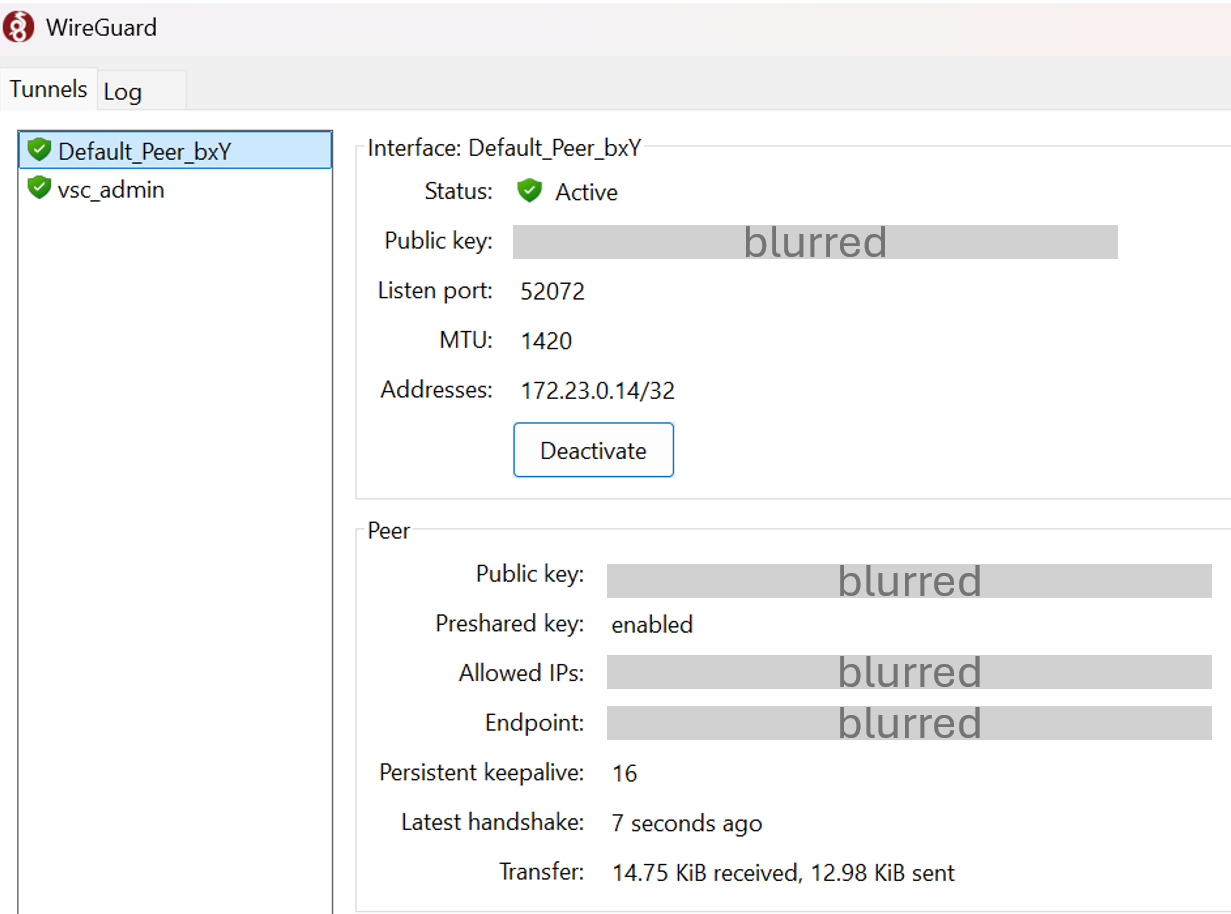
- Select the imported configuration in the "list" and press the "Activate" button.
- Once successful, the status will be indicated by a green "Active" status as can be seen below:
For Linux users
- Once the above steps are done, copy the contents of the downloaded configuration file to say
wg0.conffile in/etc/wireguard/directory. sudo wg-quick wg0
This should activate the tunnel for linux users.
ssh
Login via:
VSC-5
ssh [-X] <username>@vsc5.vsc.ac.at
VSC-4
ssh [-X] <username>@vsc4.vsc.ac.at
For MUSICA, see the relevant page here
X11 forwarding
The -X option refers to X11 forwarding, which allows to display the UI of the remote computer on your local machine. This is entirely optional. For example, applications like Mathematica or Matlab that have a graphical user interface, can be displayed on your own computer. Having said that... for better performance and because modern GUI does not run well on X-forwarding use NoMachine for application like Mathematica or Matlab. It is still useful for gnuplot, xmgrace and maybe some simple VESTA visualization.
Tip
Use NoMachine (!M) for graphic heavy applications.
One can also make this change permanent by adding the following line in $HOME/.ssh/config
ForwardX11 yes
Connecting to a specific login node
VSC-4 login nodes are named: l40, …, l47.
VSC-5 login nodes are named: l50, …, l56.
Using SSH keys
Besides the traditional password method to login, one can use the key-pair or public-key authentication. Each SSH key pair includes two keys: a public key and a private key. The public key is the one to be copied to the SSH server. The private key must remain with the user and must be kept secret. The server uses the public key to encrypt a message and send it to the client. If the client, on the user side, has the correct private key, it can decrypt the message and send it back to the server for verification.
Things to consider:
- Can be much more secure than regular password authentication.
- Can be less secure if used incorrectly (understand before use).
- Allows multiple logins without reentering password/pass phrase.
- Allows safer use of ssh chains.
Generate a key-pair on your local computer. The key must be protected by a passphrase. This passphrase should be as secure as possible. (just like a strong password).
Example to generating an ssh key-pair:
$ ssh-keygen -t rsa
Generating public/private rsa key pair.
Enter file in which to save the key ($HOME/<username>/.ssh/id_rsa):
Created directory '$HOME/<username>/.ssh'.
Enter passphrase (empty for no passphrase):
Enter same passphrase again:
Your identification has been saved in $HOME/<username>/.ssh/id_rsa.
Your public key has been saved in $HOME/<username>/.ssh/id_rsa.pub.
...
ssh-copy-id is a convenient way to do it. (you will be asked for your password).
$ ssh-copy-id <username>vsc5.vsc.ac.at
<username>@vsc5.vsc.ac.at's password:
Using ssh-keys is an option that allows you to open multiple shells on the cluster by entering your passphrase only once.
Note
In order to login to the cluster with the ssh key use the port 27 instead of the default port 22
ssh -p 27 <username>@vsc5.vsc.ac.at
SSH agent
It is possible to load the private key into your SSH agent using ssh-add -c. The -c option will ask for confirmation every time the key is used which increases security. With this ssh, scp will work without reentering your passphrase every time. With the strongly suggested -c option you have to hit enter in the confirmation dialog once every time your key is used.
$ ssh-add -c
Enter passphrase for $HOME/<username>/.ssh/id_rsa:
IDE integration
Some IDEs allow for connections to be made from within the program. An example would be VSCode:
- Download an extension called "Remote Explorer".
- Create a new SSH tunnel by clicking the "+" symbol.
- ssh [-X] vsc5.vsc.ac.at in the command pallete.
- Chose one of the config file to save the SSH configuration.
- Chose the "->" to connect within the same window, or in a new VS Code window.
- A password prompt again appears in the command pallete after which you are logged into ASC using VS Code features.
For Windows users
Users on Windows machines can also use MobaXterm to connect:
- Download the free version of MobaXTerm from this link: MobaXTerm.
- Session -> SSH -> In Basic SSH settings, enter remote host as "vsc5.vsc.ac.at" -> Click Specify username and enter your userid -> Keep Port as 22 -> (Optional) Change name to your desired name in "Bookmark settings" in "Session name" as, say VSC5.
- Click ok.
- Enter your password and OTP to connect to the ASC login node.
Putty
Putty is an alternative to the standard terminal SSH connection, it was originally designed for the Windows platform, however, can also be used on other platforms, you can download it from: https://www.chiark.greenend.org.uk/~sgtatham/putty/
You can also use public-key authentication the PuTTY SSH client. The SSH agent in PuTTY is named Pageant. Please read the PuTTY documentation for more information.
As hostname, you have to enter one of our systems (either VSC4 or VSC5).
example hostname:
vsc5.vsc.ac.at